OsseoSure Clinical Masterclass
How Osteotomes Should Not Be Used — Part 1
The OsseoSure Way — A Clinical Masterclass
24 slides · Speaker: Dr. Kedar Bakshi
Slide Gallery


Series: The OsseoSure Way — A Clinical Masterclass Series
Speaker: Dr. Kedar Bakshi
Target duration: 6–7 minutes
Slide 1 — Title Slide
"How Osteotomes Should Not Be Used. Part 1 — The OsseoSure Way"
Welcome to the OsseoSure Way clinical masterclass series. I am Dr. Kedar Bakshi, and in this lecture we are going to do something different. Before we learn how to use osteotomes correctly, let us first understand how they should NOT be used. Because once you clearly see what goes wrong, the correct method becomes obvious. I am going to take a published article on bone expansion, walk you through it step by step, and show you exactly where the technique falls short. Then I will show you my own case — same clinical situation, completely different approach, completely different result.
Slide 2 — Concave Gingival Topography
Here we begin. The article shows a clinical scenario where the natural tooth has been lost and the ridge has undergone resorption. You can see the concave gingival topography. The bone has resorbed, the ridge is narrow, and the question is: how do we prepare this site for an implant?
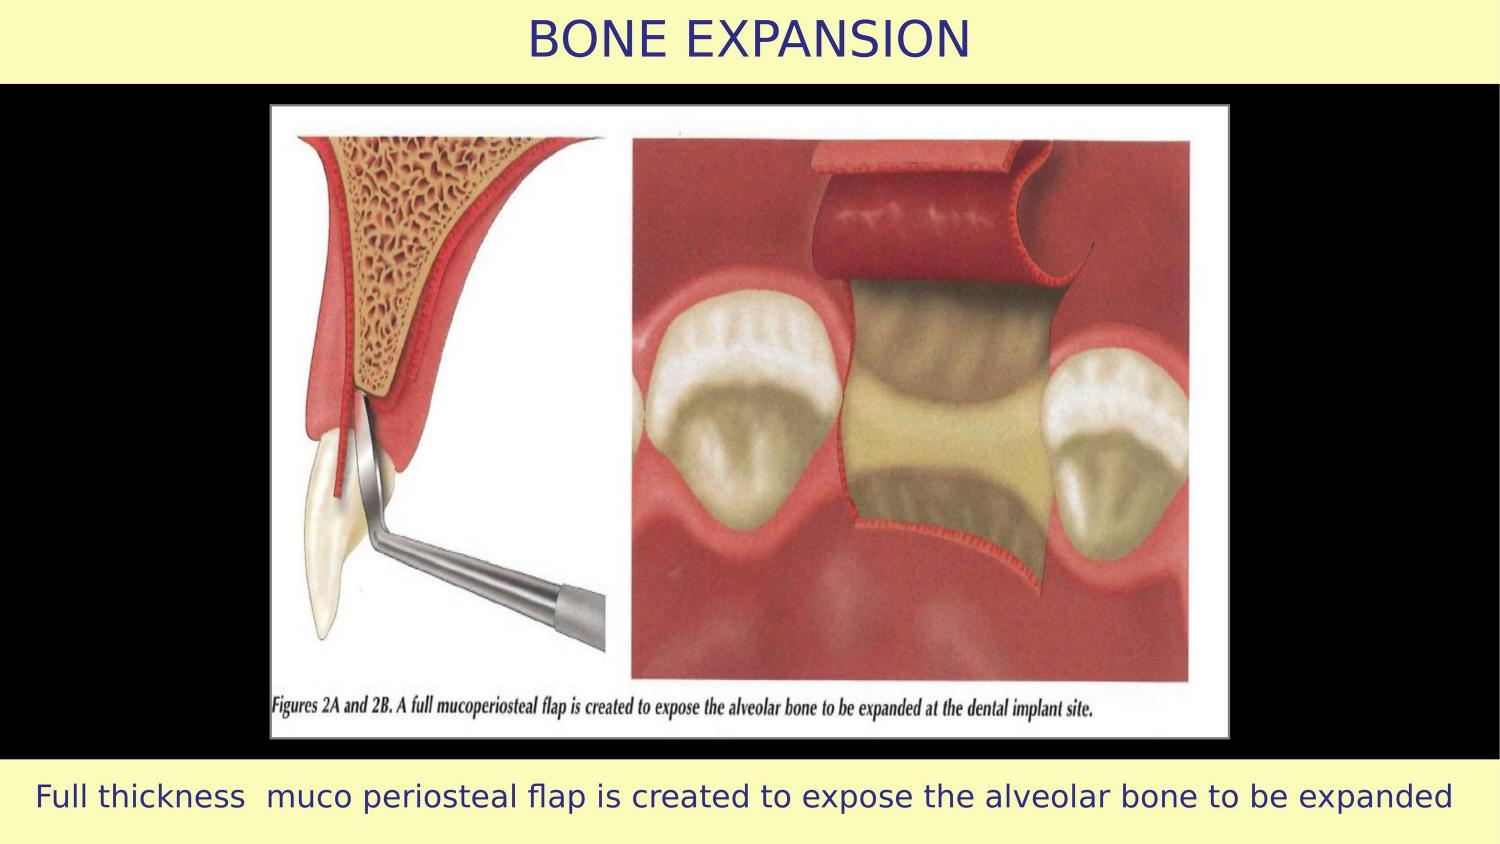
Slide 3 — Full Thickness Mucoperiosteal Flap (Article)
The article says raise a full thickness mucoperiosteal flap. This part is correct. But look at the flap design — vertical releasing incisions have been given. This is the first mistake. Vertical cuts strip the periosteal blood supply to the buccal bone — the very bone you are trying to expand and preserve. If the vertical incision crosses the mucogingival junction, you displace attached tissue coronally. The attached gingiva becomes less, and the mucogingival junction shifts. What should be done instead? A horizontal envelope flap, extended two teeth laterally on either side, gives you all the access you need without compromising blood supply.
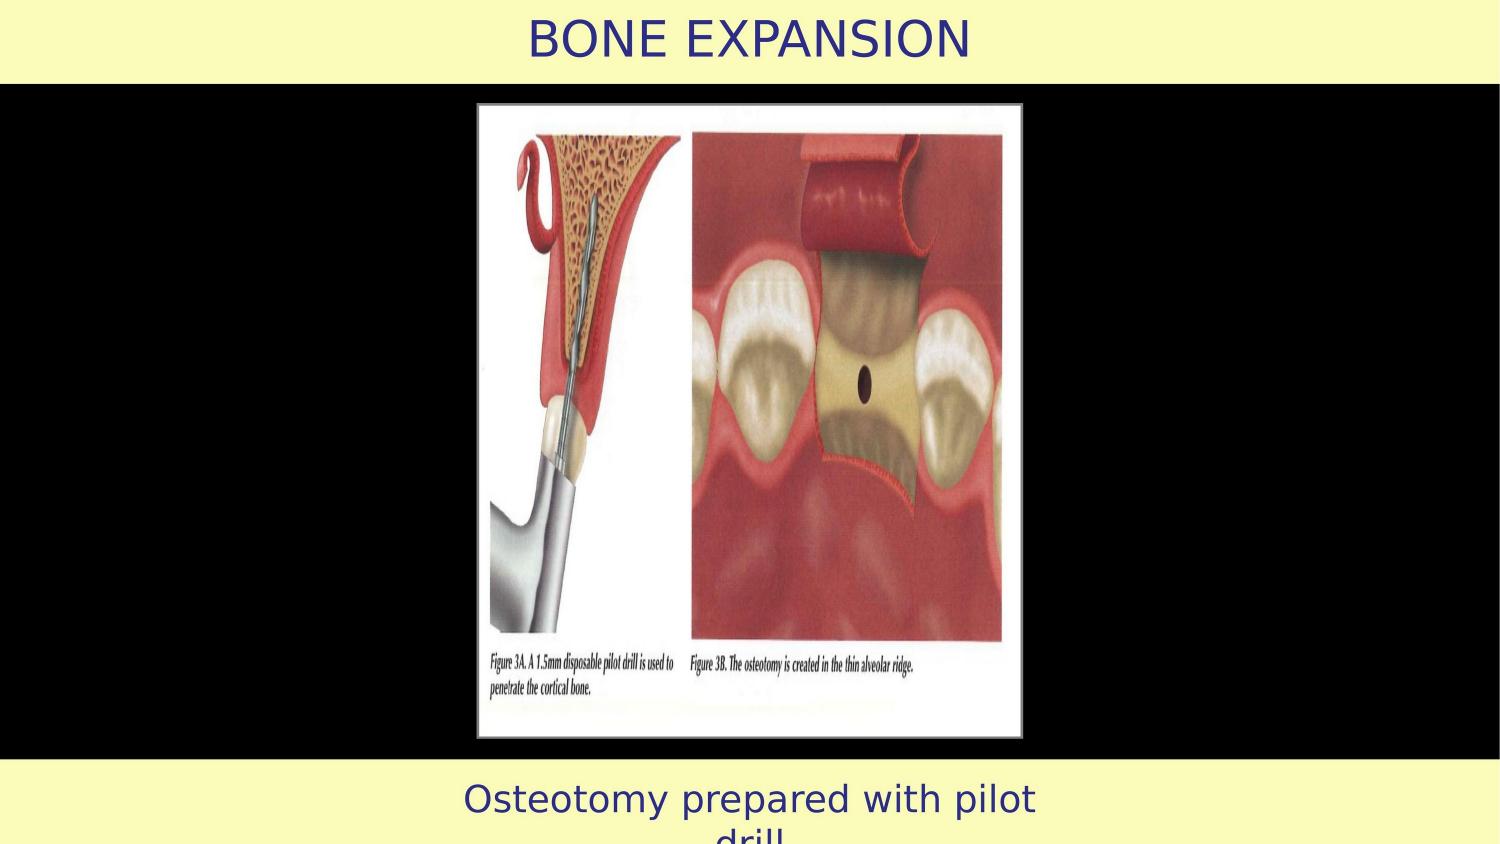
Slide 4 — Osteotomy Prepared with Pilot Drill (Article)
Now here is the critical error. The article shows a pilot drill being used first. Think about this carefully.
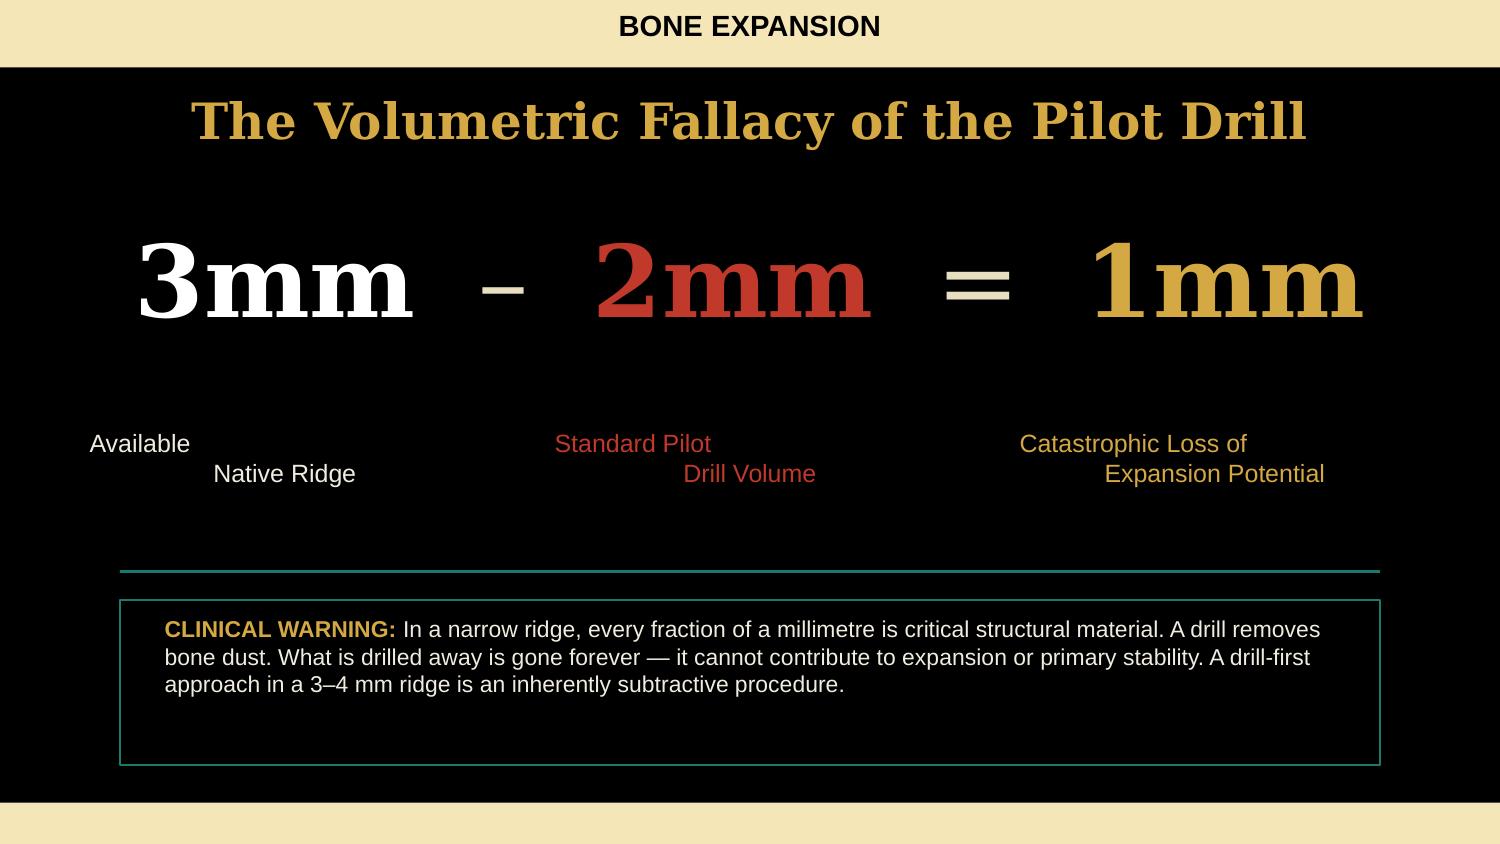
Slide 5 — The Volumetric Fallacy of the Pilot Drill (NEW)
Three millimetres of available native ridge. Minus two millimetres consumed by the pilot drill. Equals one millimetre of expansion potential. That is a catastrophic loss. In a narrow ridge, every fraction of a millimetre is critical structural material. A drill removes bone dust — what is drilled away is gone forever. It cannot contribute to expansion, it cannot contribute to primary stability. A drill-first approach in a 3 to 4 mm ridge is an inherently subtractive procedure. Your first instrument is the most important decision, and in narrow bone, that first instrument must create a horizontal cut, not a round hole that removes bone volume.
Slide 6 — Osteotomy After Drilling (Article)
Here you see the result after drilling. The osteotomy has been created, but bone has been removed. What has been drilled away is gone — it cannot contribute to expansion or implant stability.
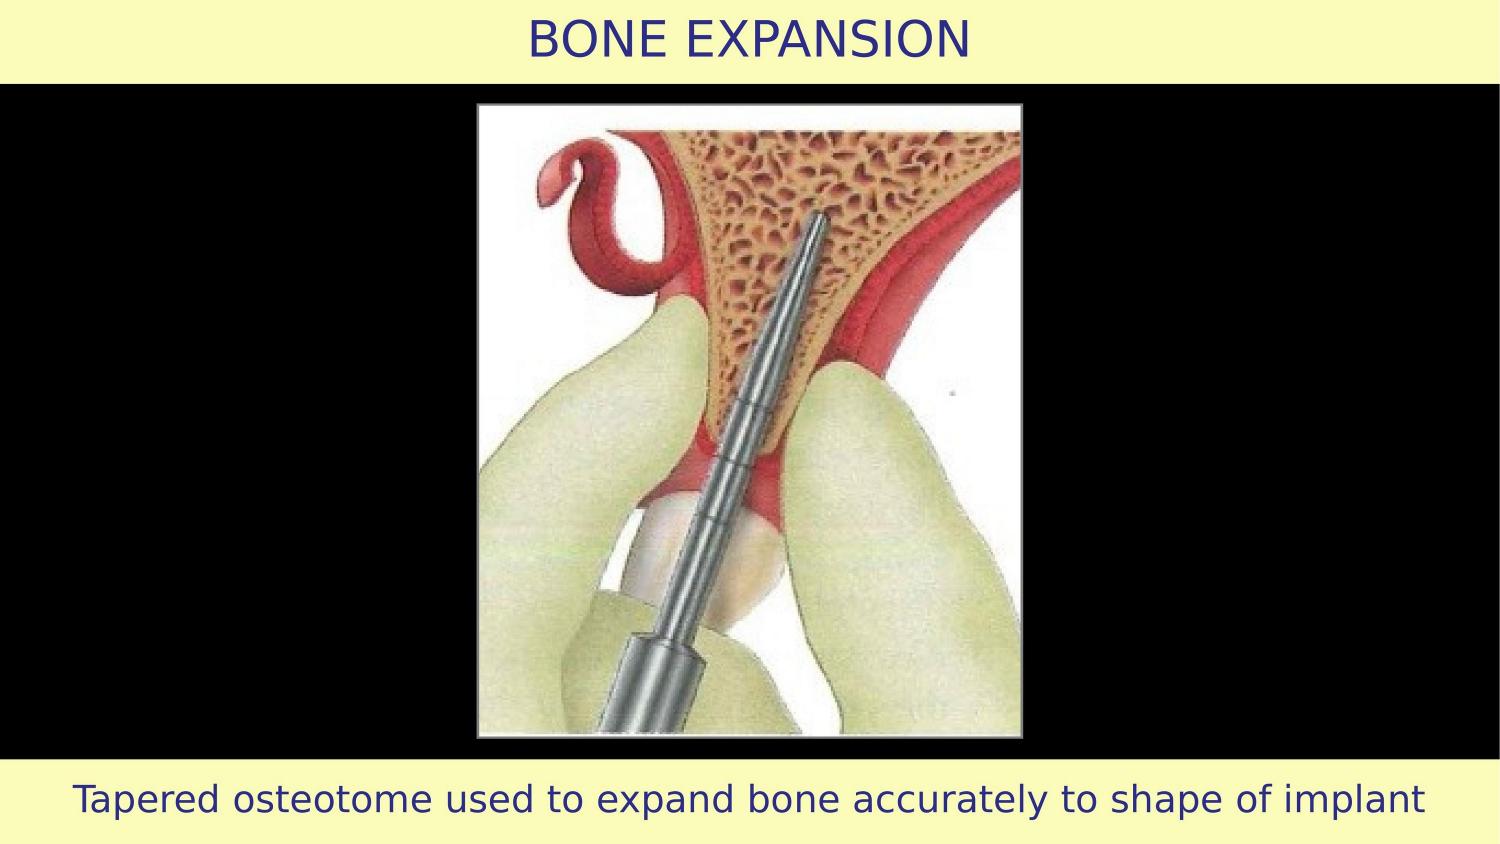
Slide 7 — Tapered Osteotome Used to Expand Bone (Article)
Now the article introduces a tapered osteotome after drilling. But something very important is not explained — is this bone hard or soft? If the bone is soft, the osteotome will first compress and condense before any expansion occurs. The topography improves with condensation. But the article's illustrations show the buccal and palatal bone thickness remaining the same before and after expansion. That is not possible. This condensation phenomenon is simply not being explained.
Slide 8 — Bone Expanded (Article)
The article claims bone is expanded. But without understanding condensation physics, without knowing bone density, and without a proper first instrument for horizontal expansion, this result is unpredictable. After every osteotome insertion, you must evaluate — check the expansion, assess the walls. The article does not mention any stepwise evaluation.
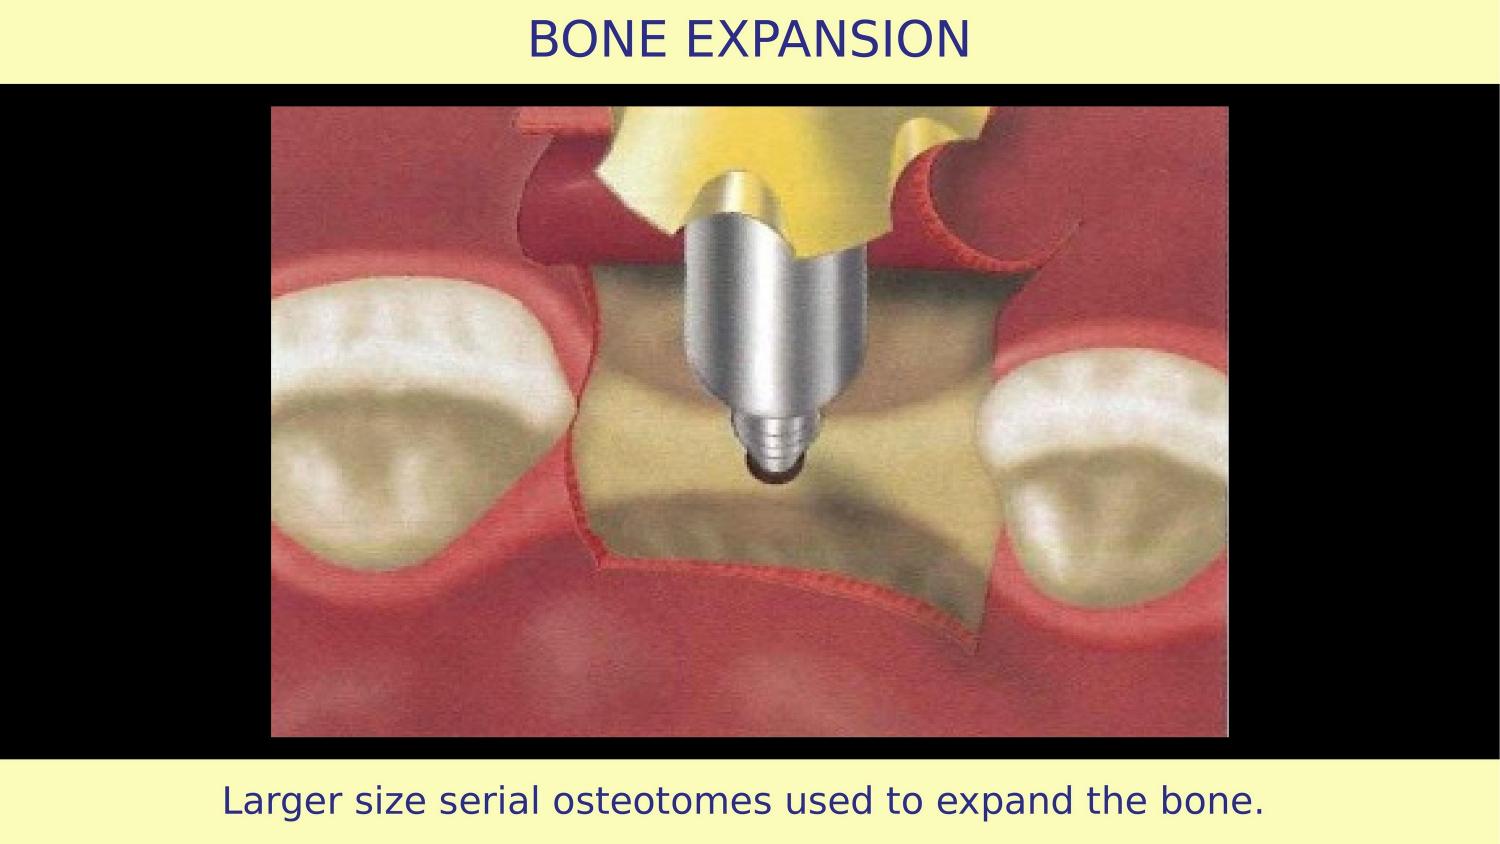
Slide 9 — Larger Size Serial Osteotomes (Article)
Serial osteotomes of increasing diameter are shown. This sequential approach works in hard bone. But in soft bone, sequential preparation is unnecessary — you can go from a purchase point directly to the final osteotome. Using the full sequence in soft bone means over-compressing. The protocol must adapt to bone quality.
Slide 10 — Bone Expanded Again (Article)
Again bone is shown as expanded. But the article has not addressed the most important question: what happens to the implant-bone interface after this preparation?
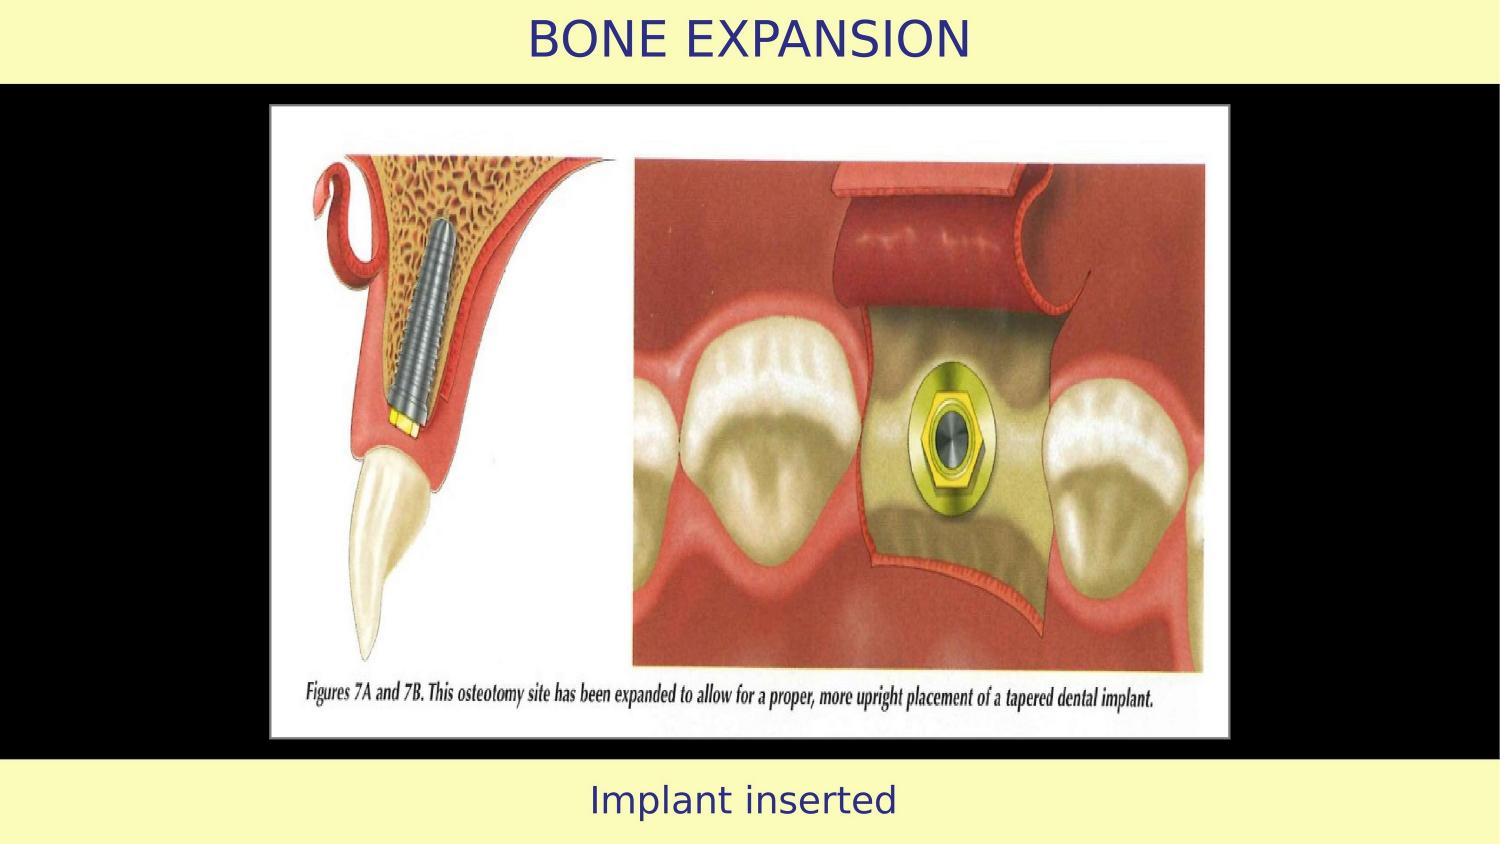
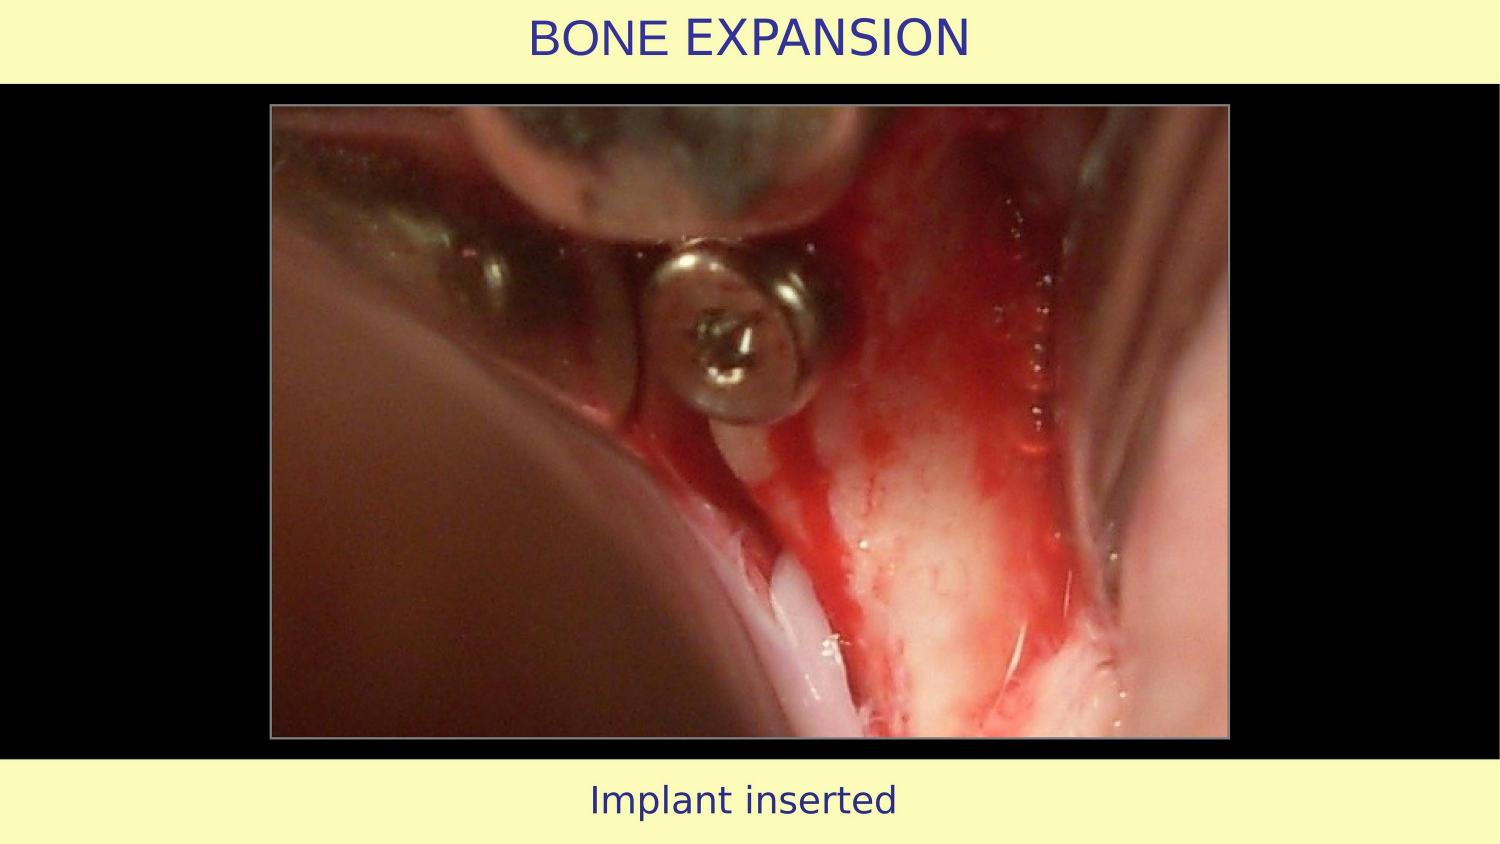
Slide 11 — Implant Inserted (Article)
The implant is placed. And here is another gap — implant thread design. After bone expansion, you need threads that condense and accommodate, not cut. Active self-tapping threads will cut into freshly expanded bone walls, destroying the condensation you just achieved. Many dentists prefer active threads for ease of insertion. But in an expanded site, that convenience comes at the cost of stability.
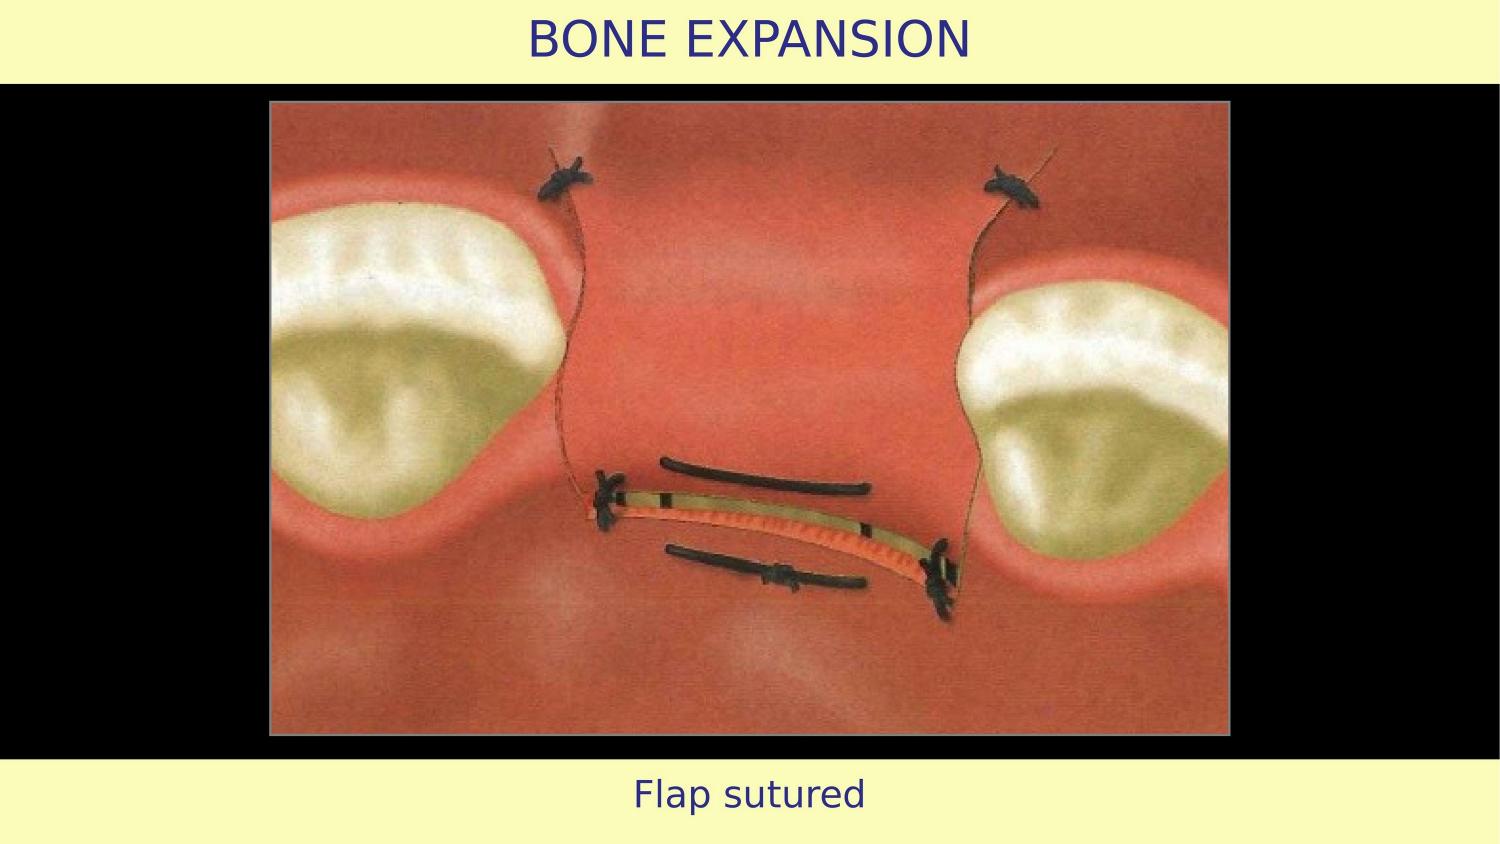
Slide 12 — Flap Sutured (Article)
The flap is sutured and the article concludes. But the suturing philosophy also matters. My approach has evolved — I do not aggressively loosen the flap for primary closure. I intentionally leave a small area exposed for secondary intention healing. This acts like an apically repositioned flap and actually increases the band of attached tissue.
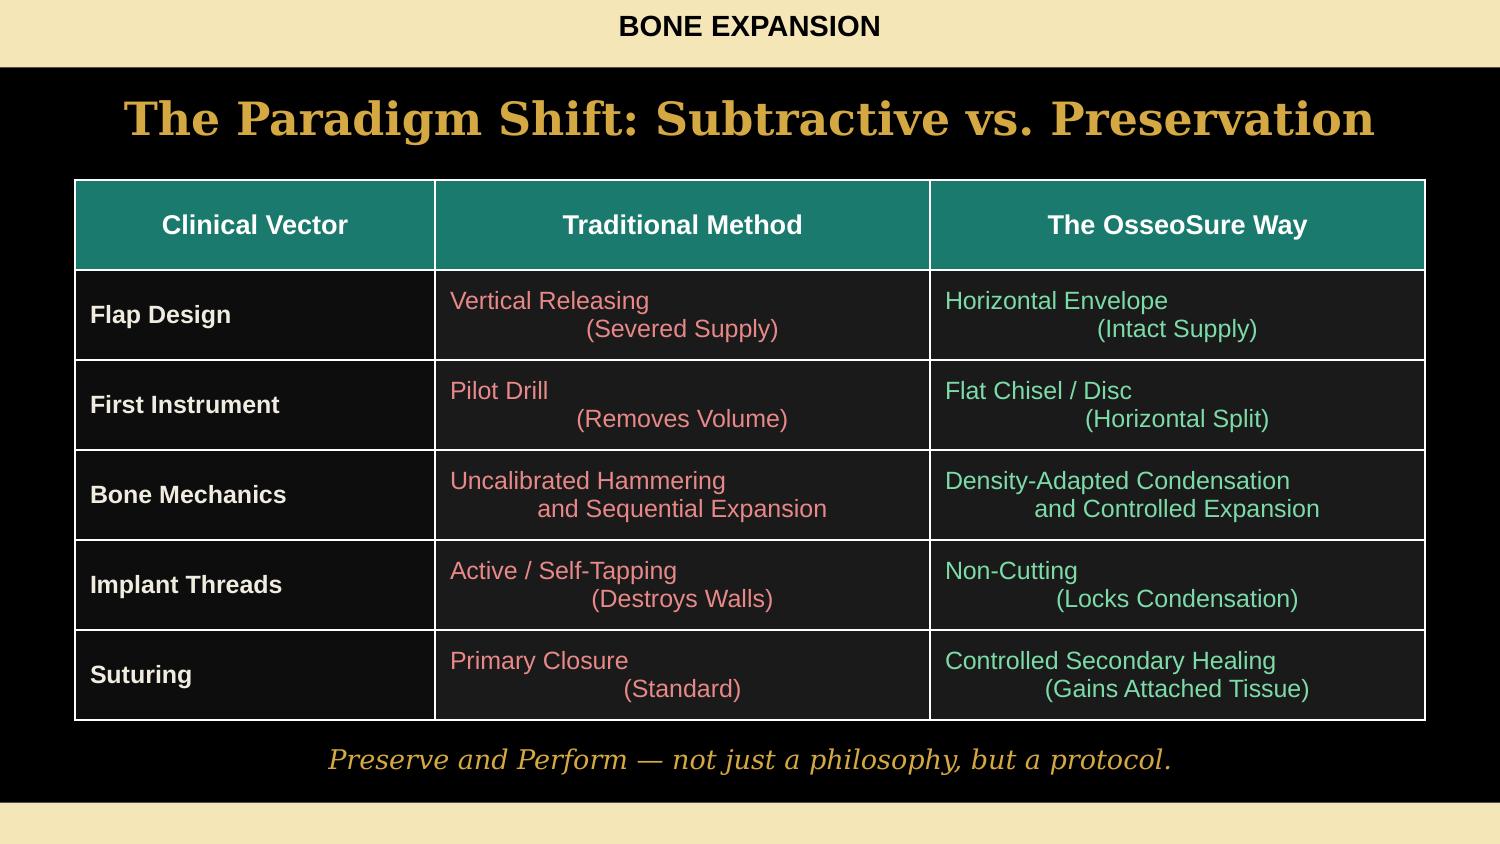
Slide 13 — The Paradigm Shift: Subtractive vs. Preservation (NEW)
So let us summarise what we have just seen. On every clinical vector — flap design, first instrument, bone mechanics, implant threads, even suturing — the traditional approach is subtractive. It removes, cuts, and compromises. The OsseoSure Way preserves, condenses, and improves. This is not just a philosophy — it is a protocol. Every step has a reason. Now let me show you the proof.
Slide 14 — Explanation with Case (Transition)
That was the article. Now let me show you how I approach the exact same clinical situation — Division B bone, narrow ridge — but with a completely different philosophy.
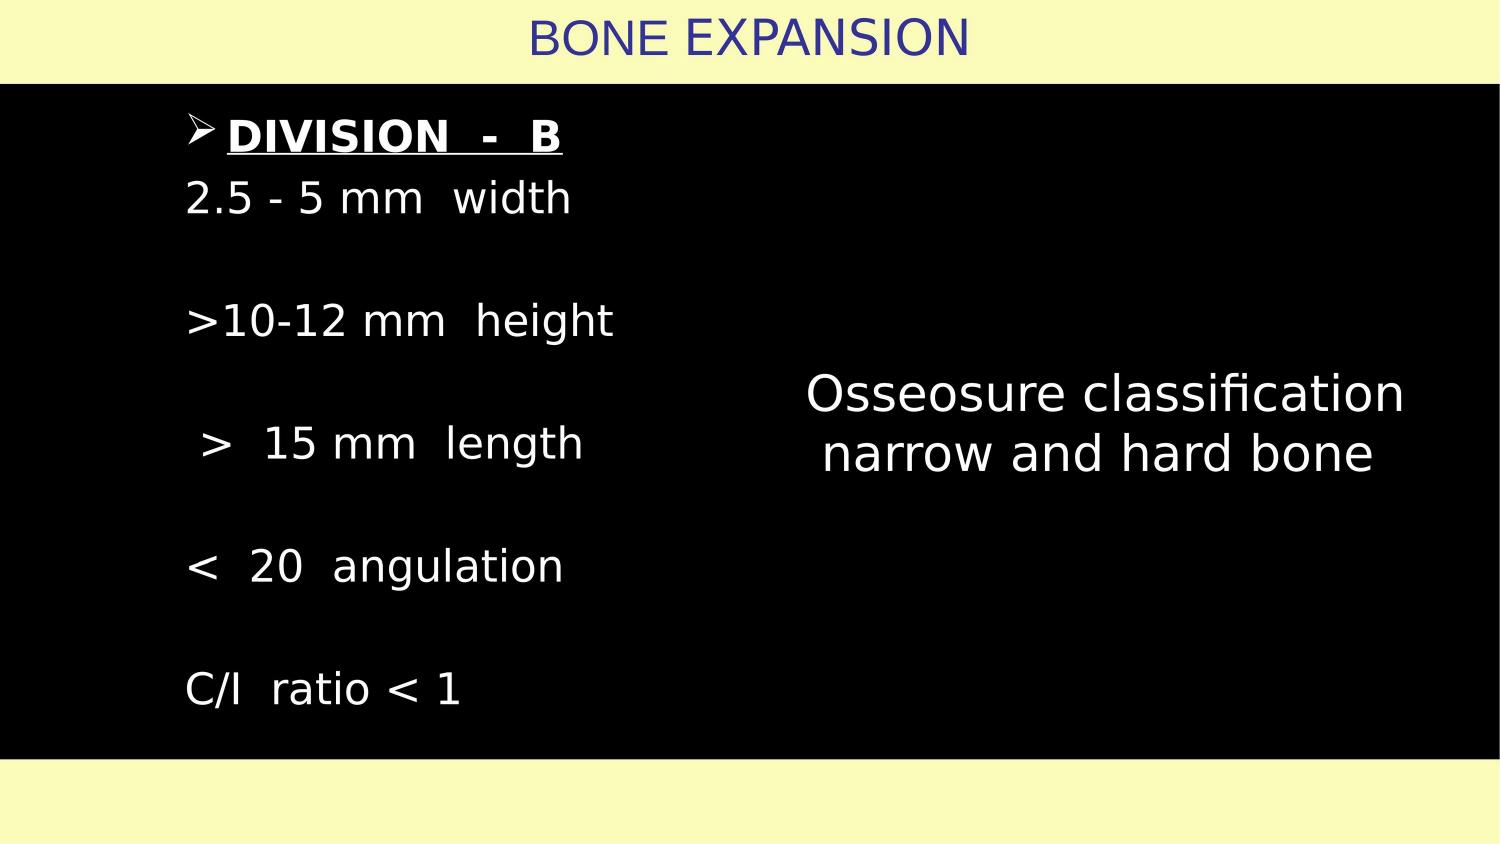
Slide 15 — Division B Bone Classification
This is a Division B ridge — 2.5 to 5 mm width, adequate height of 10 to 12 mm, length greater than 15 mm, angulation less than 20 degrees, crown-to-implant ratio less than 1. In the OsseoSure classification, this is narrow and hard bone. The four-quadrant matrix tells us: narrow and hard means ridge split and expand. No grafting. No drill-first protocol.
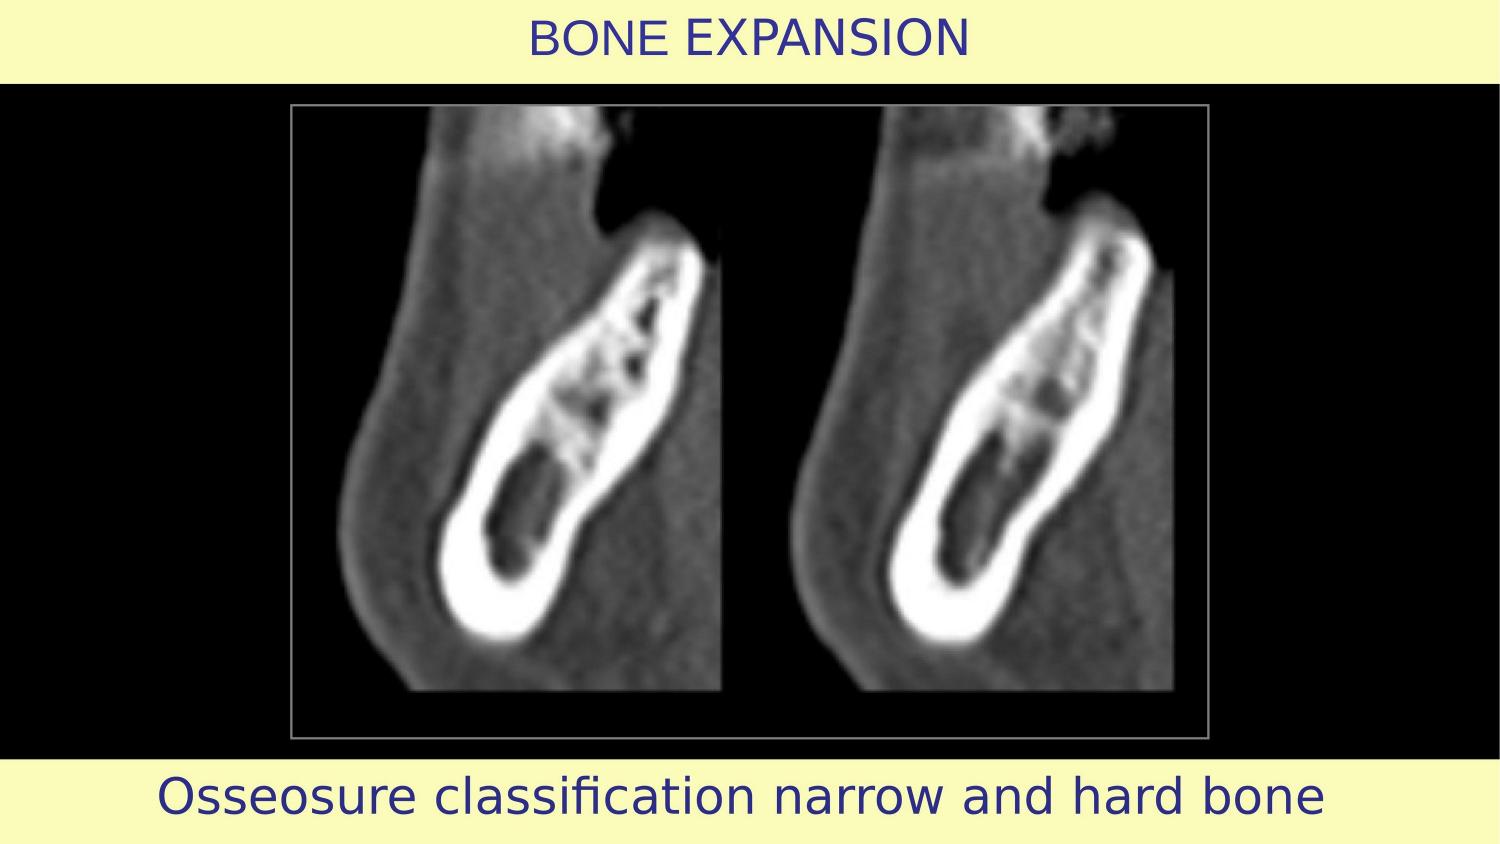
Slide 16 — CBCT: OsseoSure Classification — Narrow and Hard Bone
Here is the CBCT of my case. You can see the narrow ridge clearly in cross-section. The bone is dense. Before even touching the patient, the CBCT has already told me my protocol: horizontal osteotomy first to create the split, then controlled expansion. No drill will touch this ridge.
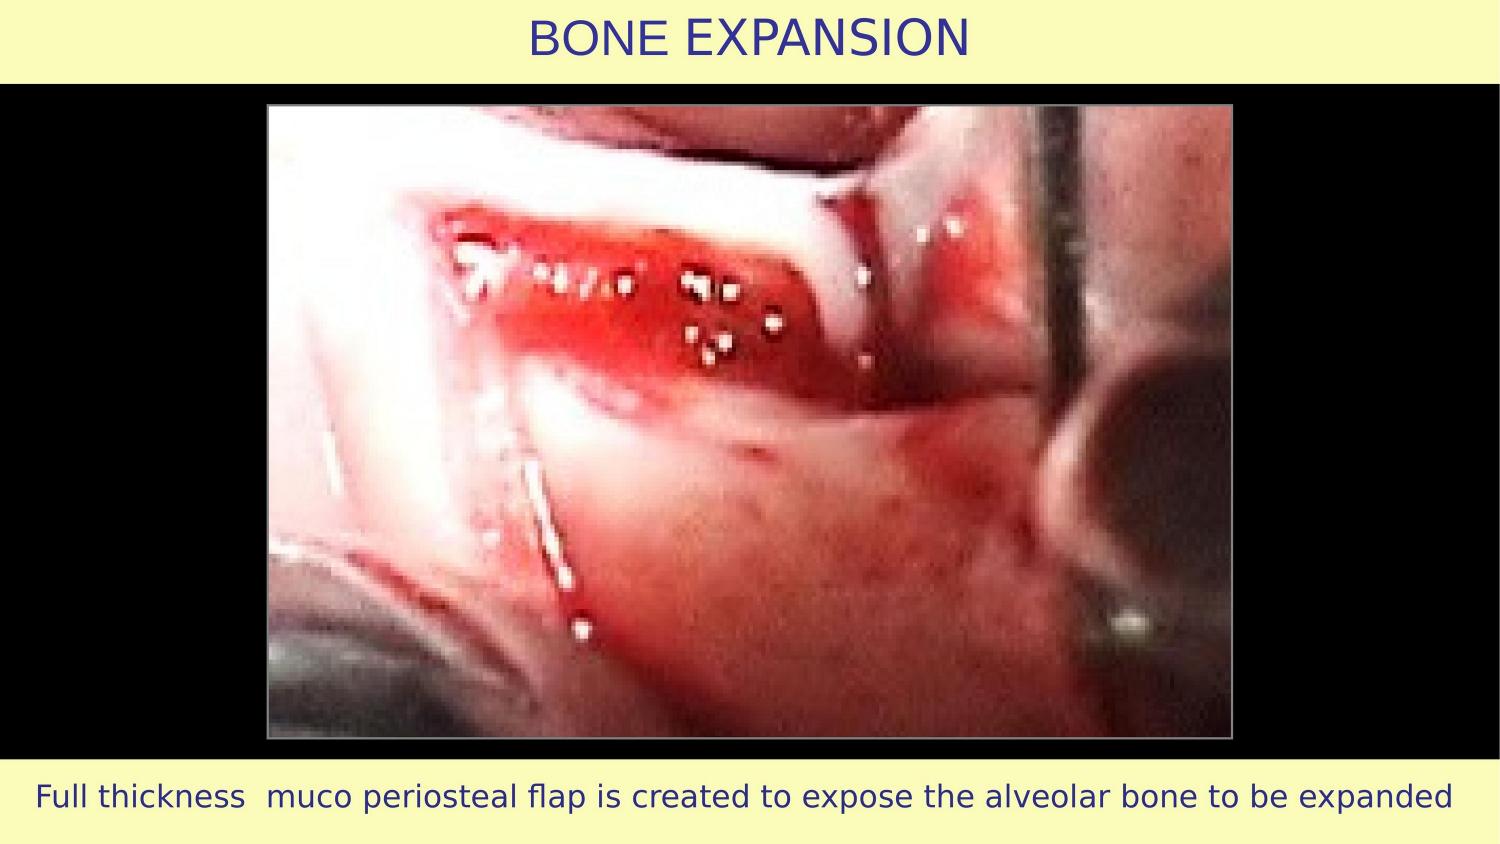
Slide 17 — Full Thickness Mucoperiosteal Flap (My Case)
Here is my flap. Full thickness mucoperiosteal — same as the article recommended. But notice the difference: no vertical releasing incisions. A clean horizontal envelope flap, extended laterally, preserving the periosteal blood supply completely.
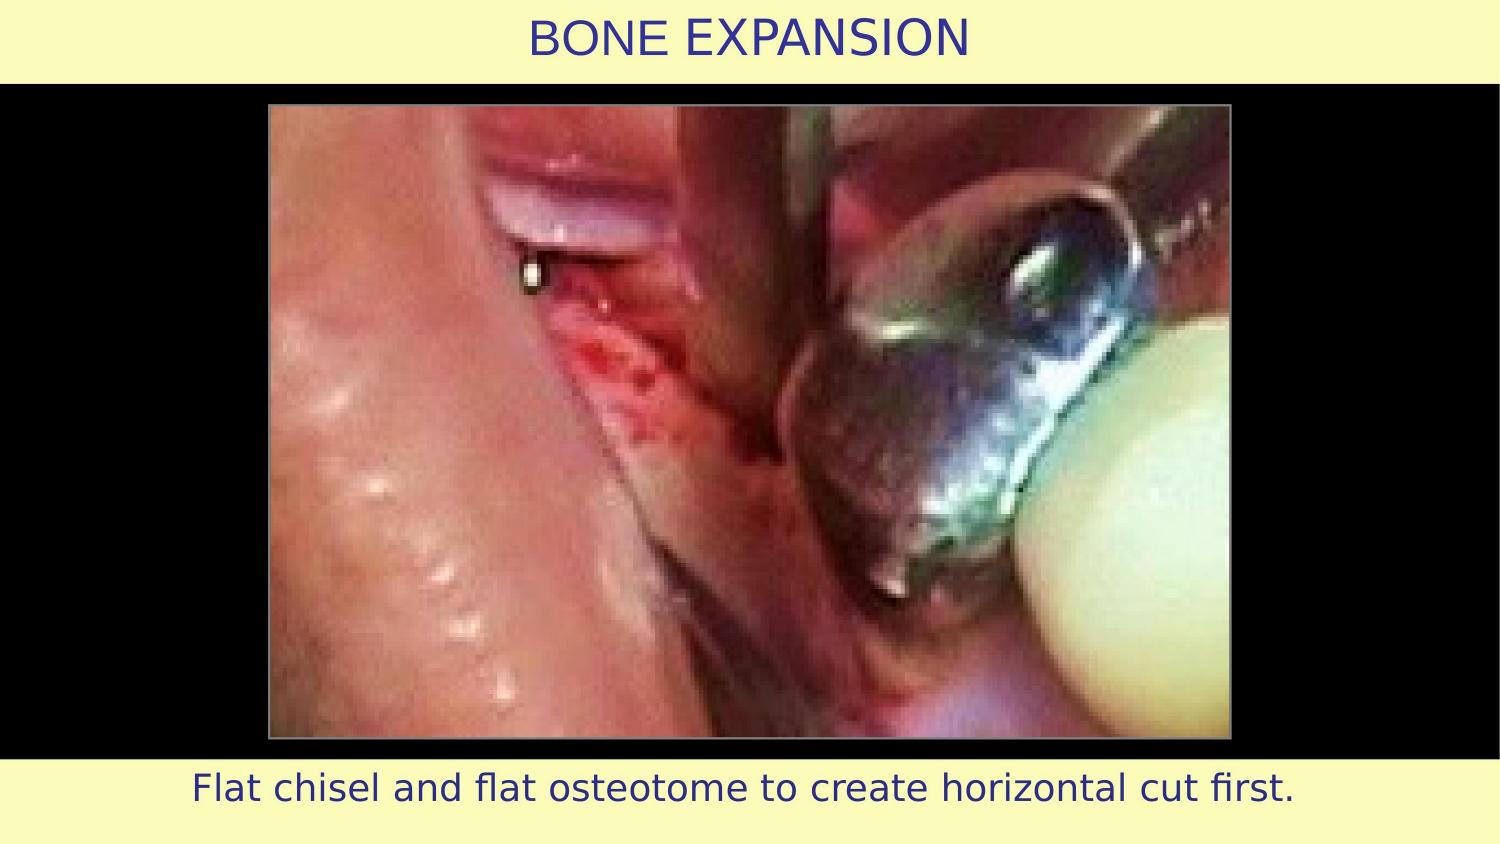
Slide 18 — Flat Chisel and Flat Osteotome — Horizontal Cut First
This is where my approach diverges completely. I begin with a horizontal cut — what I call the keyhole pattern. In this case, the horizontal expansion is done only on the distal side because the implant position is very close to the neighbouring tooth. In my early cases, I used chisels. Then came the disc — 500 microns thick, very sharp, very precise.
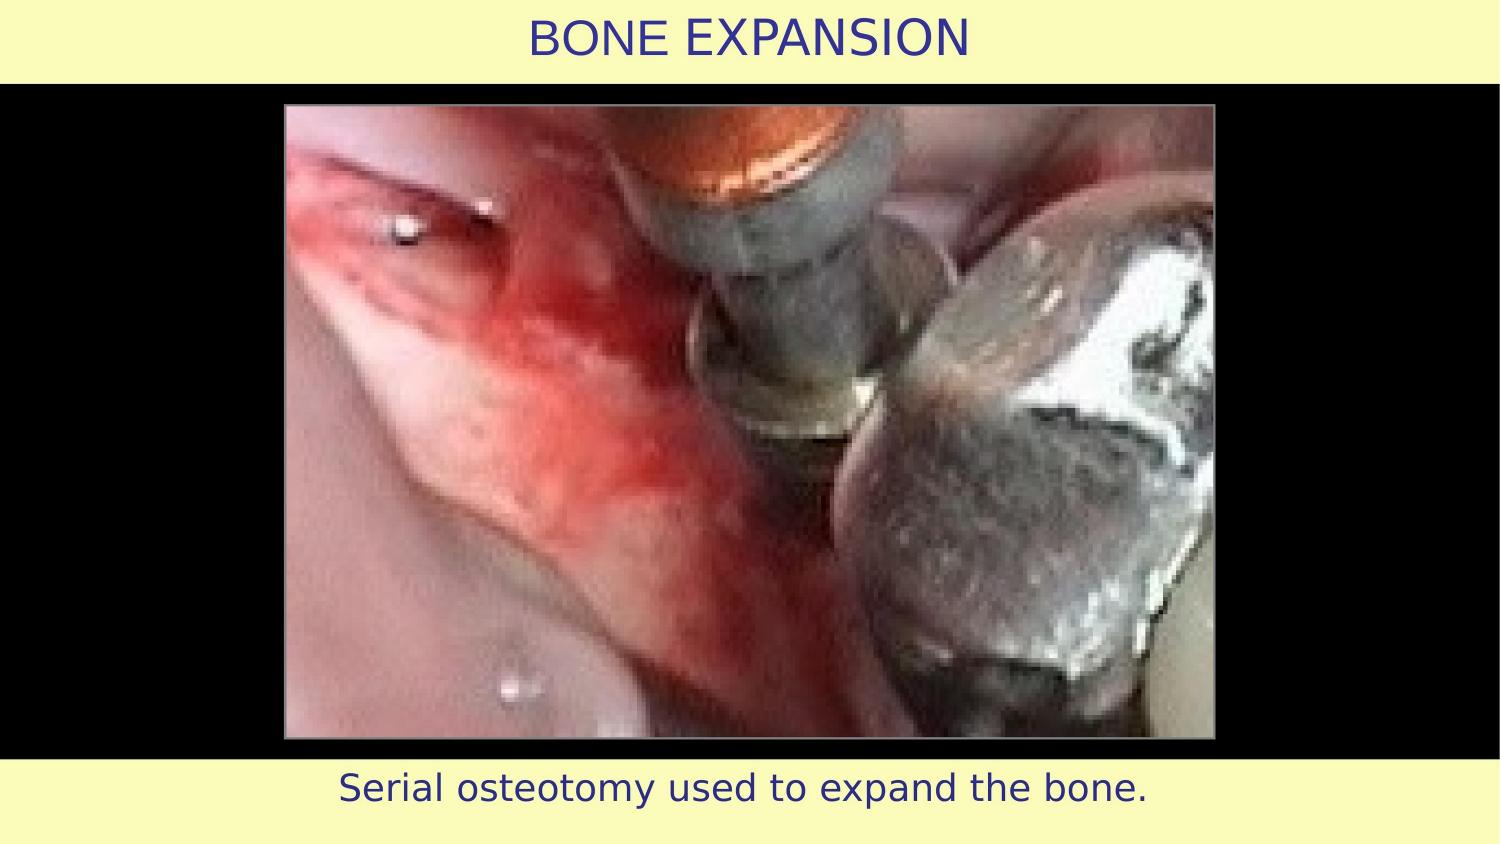
Slide 19 — Serial Osteotomy to Expand the Bone
Now the controlled expansion begins. Gradual, predictable, respecting the bone biology. No thup-thup hammering. No frustration-driven force.
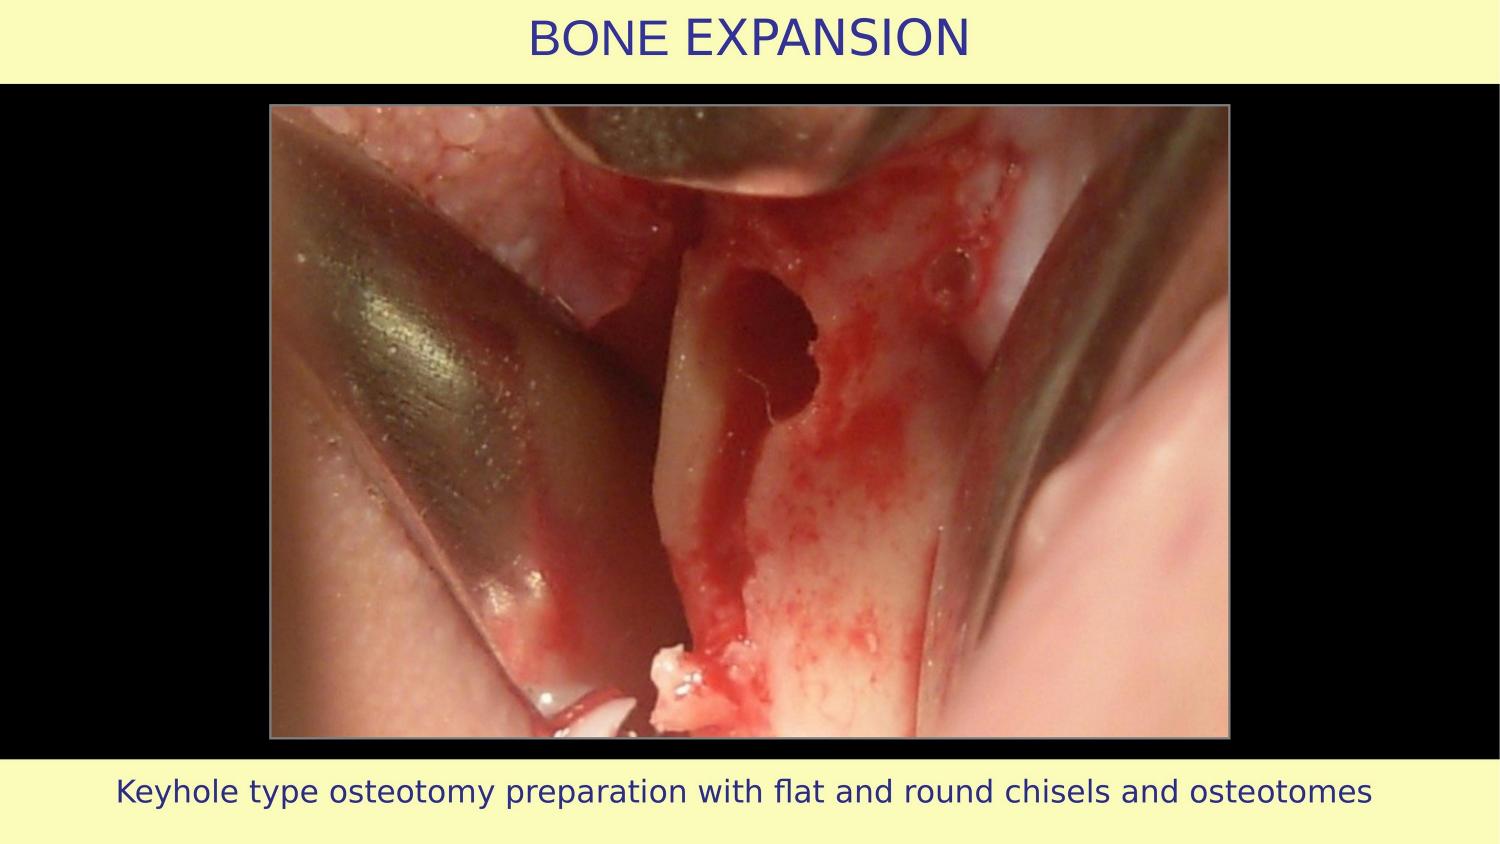
Slide 20 — Keyhole Type Osteotomy Preparation
The keyhole pattern — horizontal expansion using flat and round chisels and osteotomes. The bone is split, expanded, and condensed. No bone has been removed. Every bit of native bone is still present, contributing to implant stability.
Slide 21 — Implant Inserted (My Case)
The implant is positioned. Notice the three-dimensional placement — this is not where the bone forced me to put it. This is where the prosthetics demands it should be. Because OsseoSure expansion preserved and improved the bone architecture, I have freedom to place the implant in the ideal position.
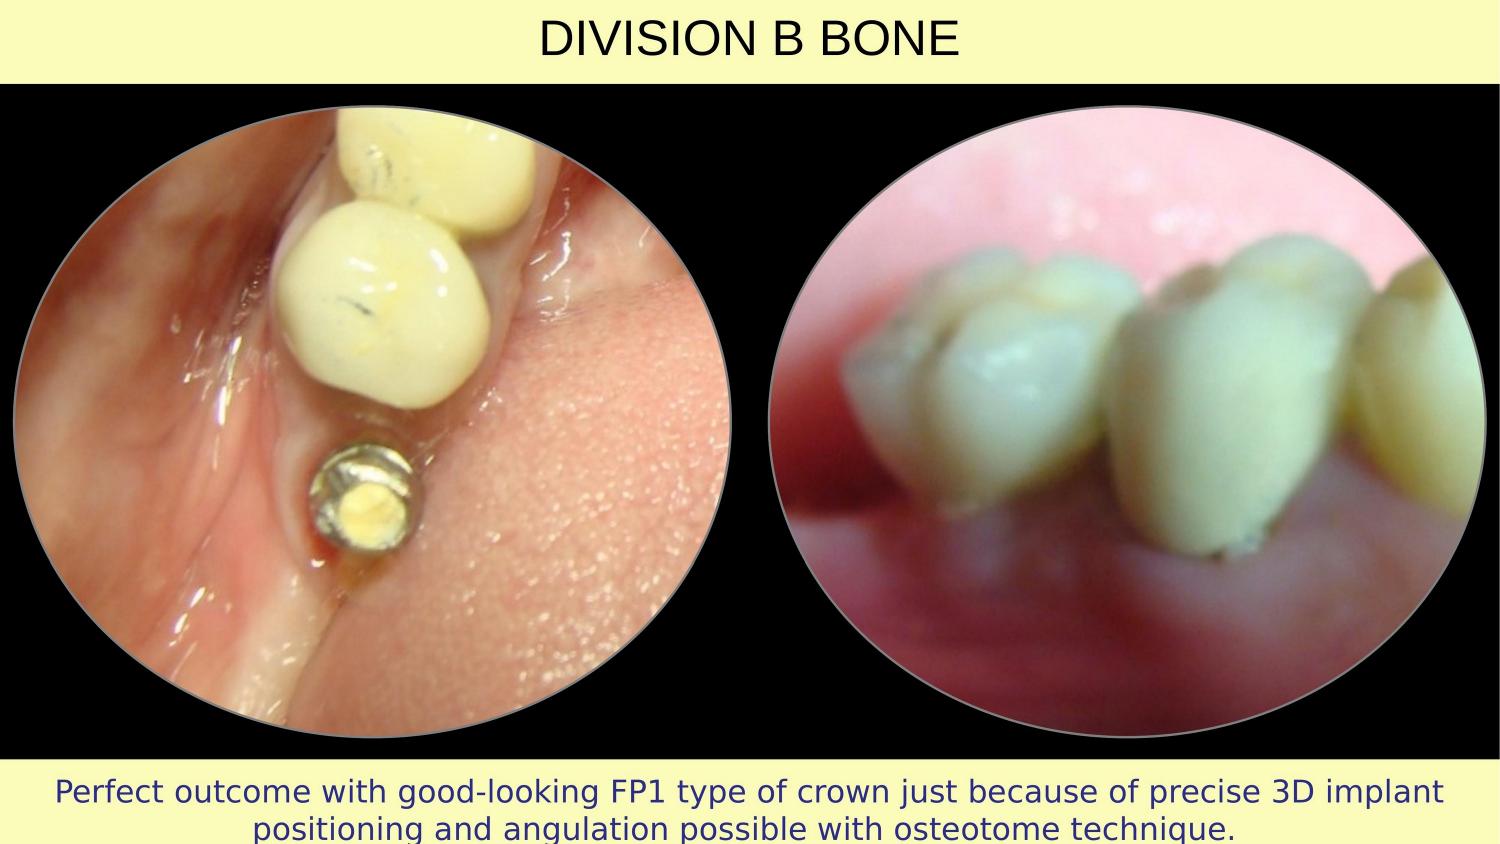
Slide 22 — FP1 Crown — Final Result
And here is the final result. An FP1 type crown — meaning the crown emerges naturally from the gingiva, like a natural tooth. No visible metal, no recession, no compromise. This is what precise 3D implant positioning and angulation makes possible with the osteotome technique. This is the outcome the Preserve and Perform philosophy delivers.
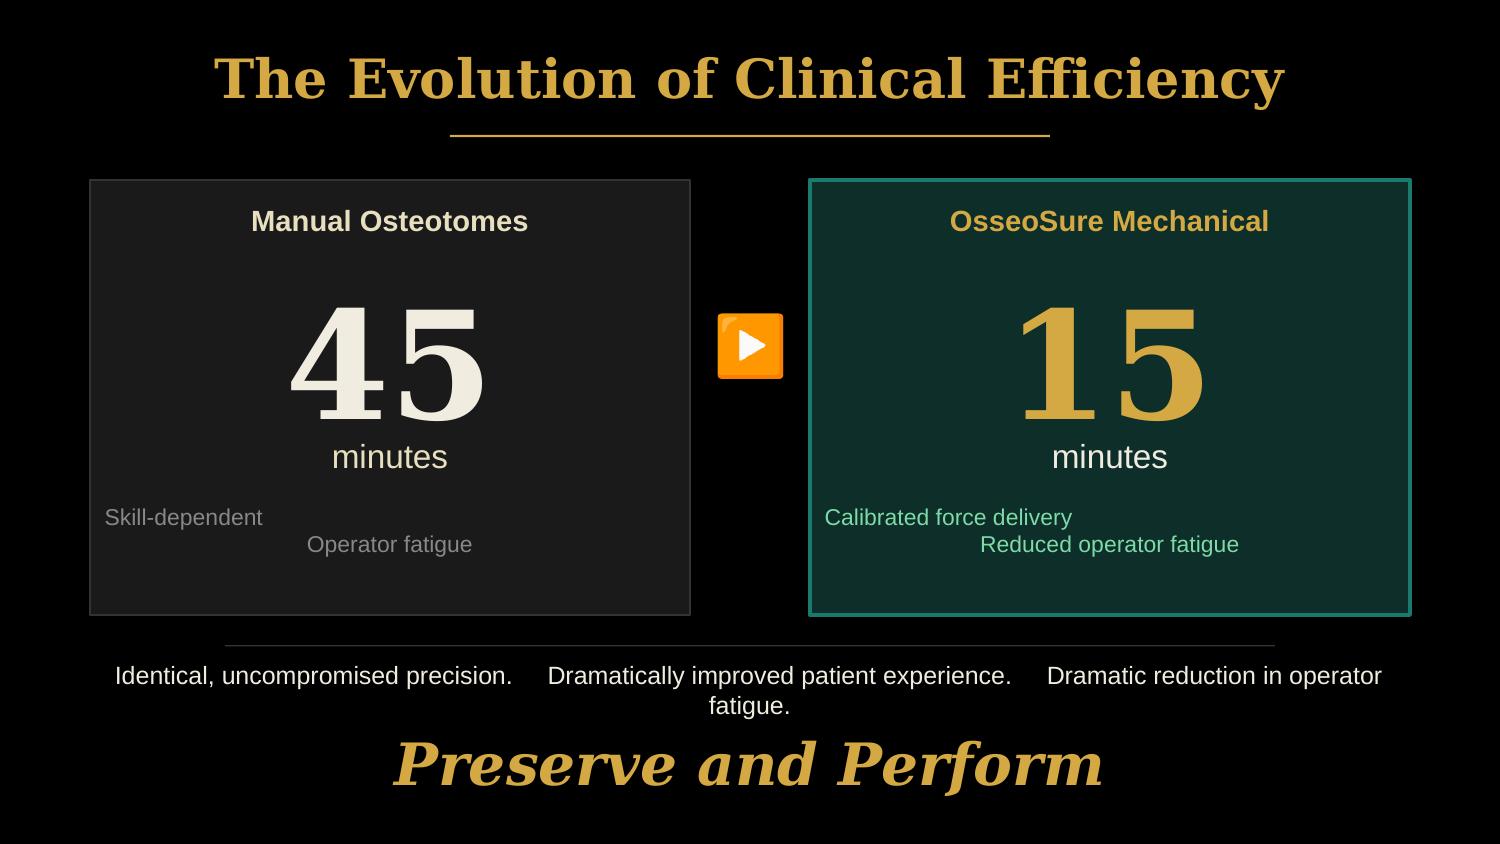
Slide 23 — The Evolution of Clinical Efficiency (NEW)
One more thing. This case was done with manual osteotomes, before OsseoSure was available. The osteotomy alone took 45 minutes. With OsseoSure's mechanical system today, the same procedure takes about 15 minutes. Same precision. Same outcome. Dramatically less operator fatigue. Dramatically improved patient experience. This is the evolution — from skill-dependent to system-assisted. Preserve and Perform.
Slide 24 — Thank You
Thank you for watching. In Part 2, we will explore how the rapid tap-tap movement in ridge split and indirect sinus lift, when done correctly, transforms the procedure. And in Part 3, we will compare tapered osteotomes versus parallel osteotomes and understand why geometry matters. Until then — preserve and perform.
| # | Slide | Type |
|---|-------|------|
| 1 | Title: How Osteotomes Should Not Be Used, Part 1 | Title |
| 2 | Concave gingival topography | Article |
| 3 | Full thickness mucoperiosteal flap (article) | Article |
| 4 | Osteotomy prepared with pilot drill | Article |
| 5 | The Volumetric Fallacy of the Pilot Drill | NEW |
| 6 | Osteotomy after drilling | Article |
| 7 | Tapered osteotome to expand bone | Article |
| 8 | Bone expanded | Article |
| 9 | Larger size serial osteotomes | Article |
| 10 | Bone expanded | Article |
| 11 | Implant inserted (article) | Article |
| 12 | Flap sutured (article) | Article |
| 13 | The Paradigm Shift: Subtractive vs. Preservation | NEW |
| 14 | Explanation with case (transition) | Transition |
| 15 | Division B bone classification | Case |
| 16 | CBCT — narrow and hard bone | Case |
| 17 | Full thickness flap (Dr. Bakshi's case) | Case |
| 18 | Flat chisel — horizontal cut first | Case |
| 19 | Serial osteotomy — expansion | Case |
| 20 | Keyhole type osteotomy preparation | Case |
| 21 | Implant inserted (Dr. Bakshi's case) | Case |
| 22 | FP1 crown — final result | Case |
| 23 | The Evolution of Clinical Efficiency (45→15 min) | NEW |
| 24 | Thank you | Closing |
Join the OsseoSure Clinical Community
Free — get notified when new lectures and cases are published.